Baked brie is a delicacy and so easy to make! Don't wait until you have guests to make it. This simple recipe is ready in about 20 minutes.
This baked brie recipe is a simple way to enjoy soft, gooey cheese with minimal effort, and it's sophisticated enough to serve as a great appetizer when you host. While it's fine to add toppings like jam, honey, or nuts if you wish, this truly simple recipe highlights the deliciousness of the cheese itself.
Ingredients and Variations

You'll need just one ingredient to make this recipe: brie cheese! In the United States, brie usually comes in 8 or 12-ounce wheels, as shown in the photo above. It can have a higher or lower fat content - both work in this recipe. I've made it with regular and double-cream brie, and both worked equally well.
This recipe was written for an 8-ounce wheel, but it works for 12 ounces, too. The baking time for 12 ounces is nearly the same as for 8 ounces, and I would encourage you to always start checking after about 10 minutes.
Optional Ingredients
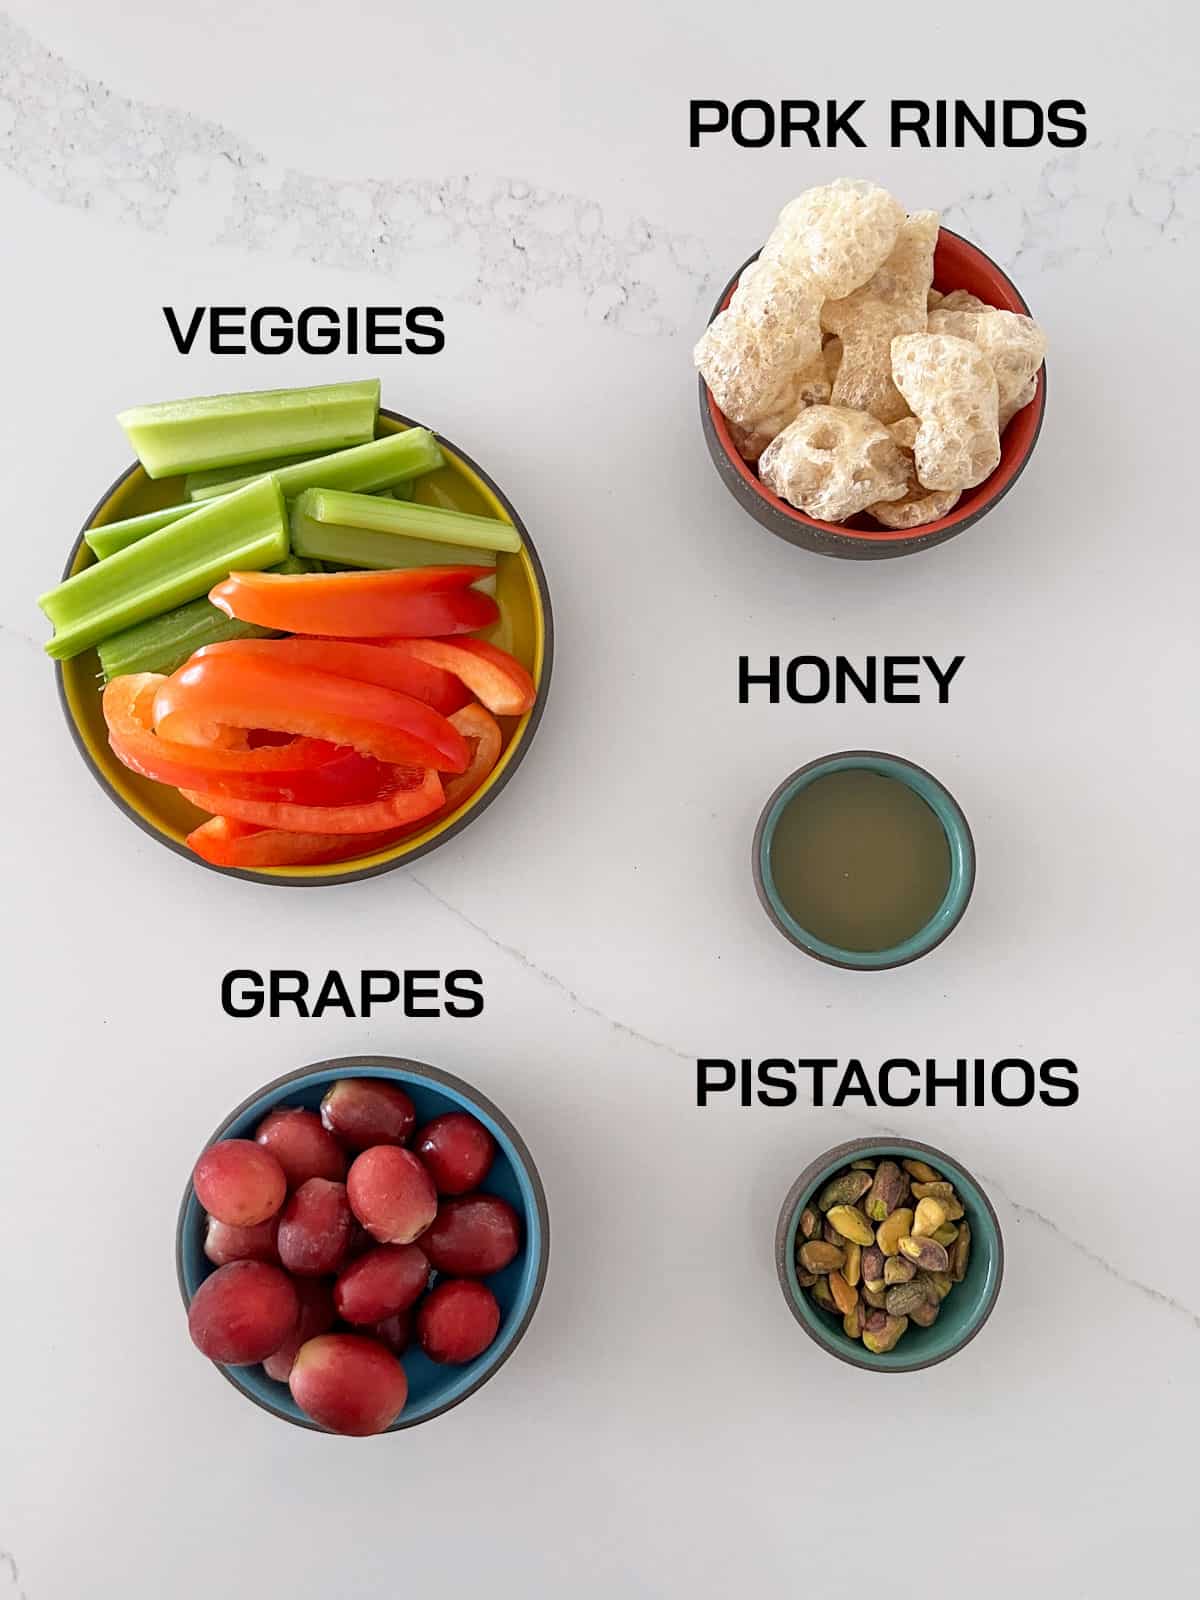
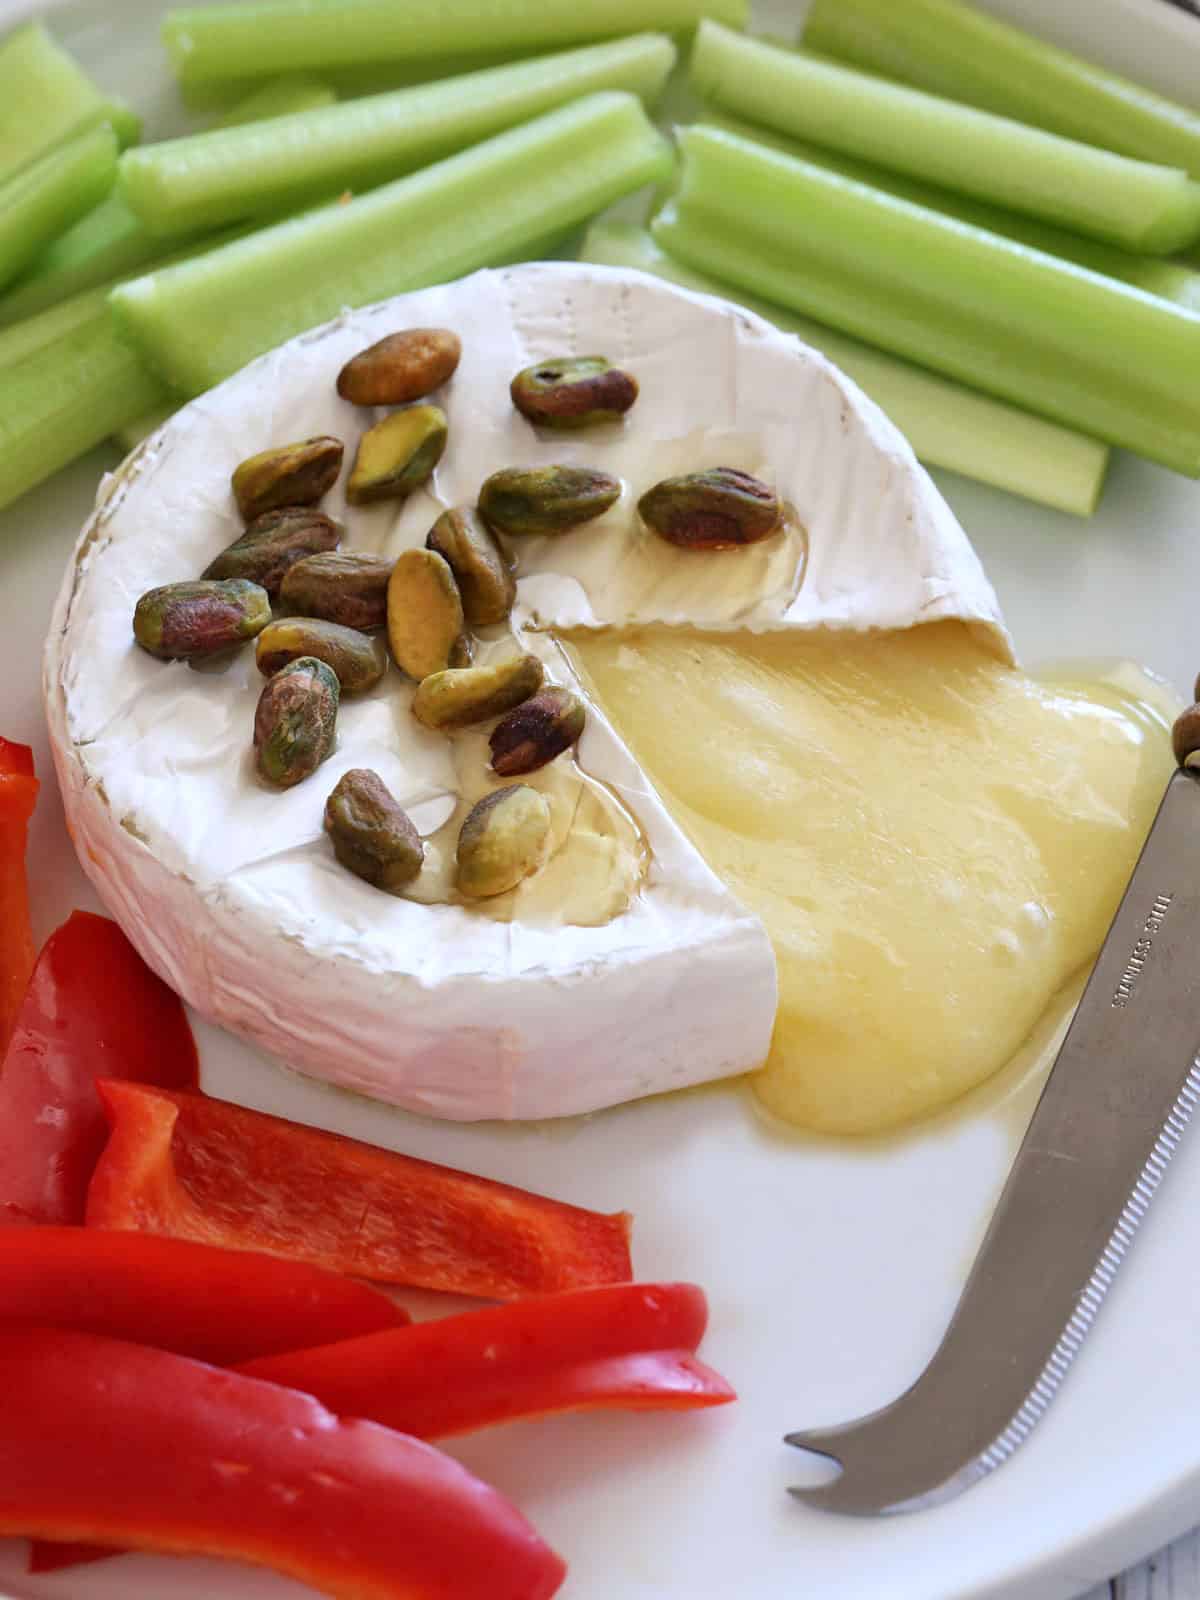
After baking, you can drizzle the brie with honey and sprinkle it with chopped nuts (I like pistachios). That's a fine option, but I greatly enjoy brie's savoriness and prefer not to cut it with a sweet condiment. So, instead of topping it with honey, I often serve honey, grapes, and pistachios alongside the cheese.
To scoop the cheese, you would commonly use crackers or crostini. Since I eat a low-carb diet, I usually serve baked brie with celery sticks, red pepper slices, plain pork rinds, and keto crackers (when I have the patience to bake them).
Instructions
The detailed instructions and step-by-step photos are included in the recipe card. Here's a quick overview.
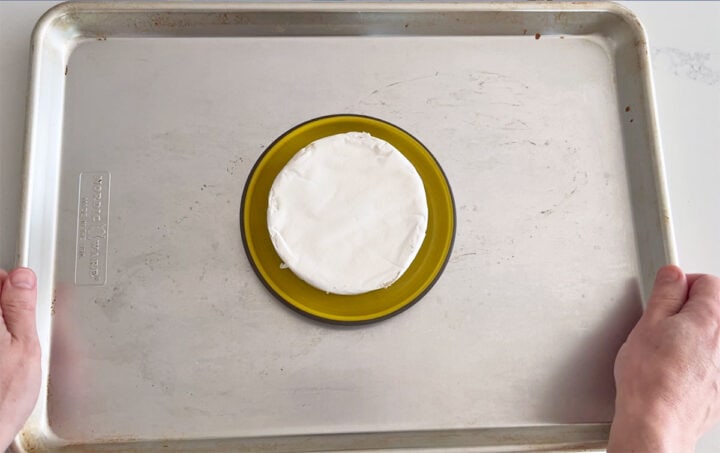
- Unwrap the cheese and place it in a shallow ovenproof dish or on a piece of parchment placed on a rimmed baking sheet.
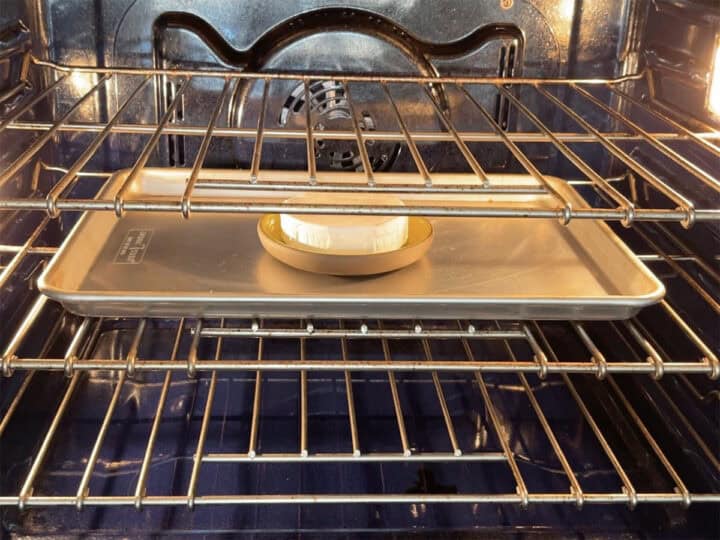
- Bake the cheese until the top center is very soft when you gently press on it. How long? This would depend on the cheese and can take anywhere from 10 to 20 minutes.
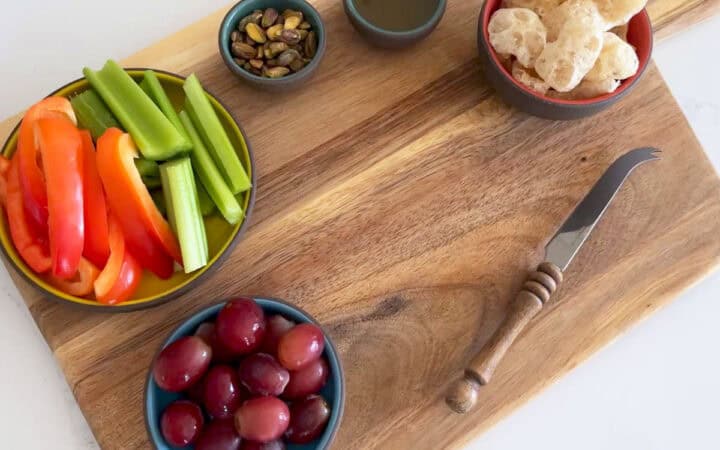
- While the cheese is baking, arrange the remaining ingredients (crackers, veggies, fruit, etc.) on a wooden board, leaving enough room for the cheese.
- Carefully remove the baking dish from the oven and place it on the board. Using a cheese knife, cut into the cheese. It will immediately ooze onto the plate (or parchment).
- Dig in immediately! The cheese will remain gooey for about 10 minutes and soft for 10 more minutes. When it's no longer scoopable, you can use a cheese knife to smear it on your crackers or crudites.

Recipe Tip
I always try to write recipes that are as precise as possible, but when it comes to baked brie, there are too many variables to ensure consistent results every time. Your results will be determined by the type of brie you use and how hot your oven runs. So, start checking after 10 minutes, and add 2-3 minutes at a time until the center feels soft.
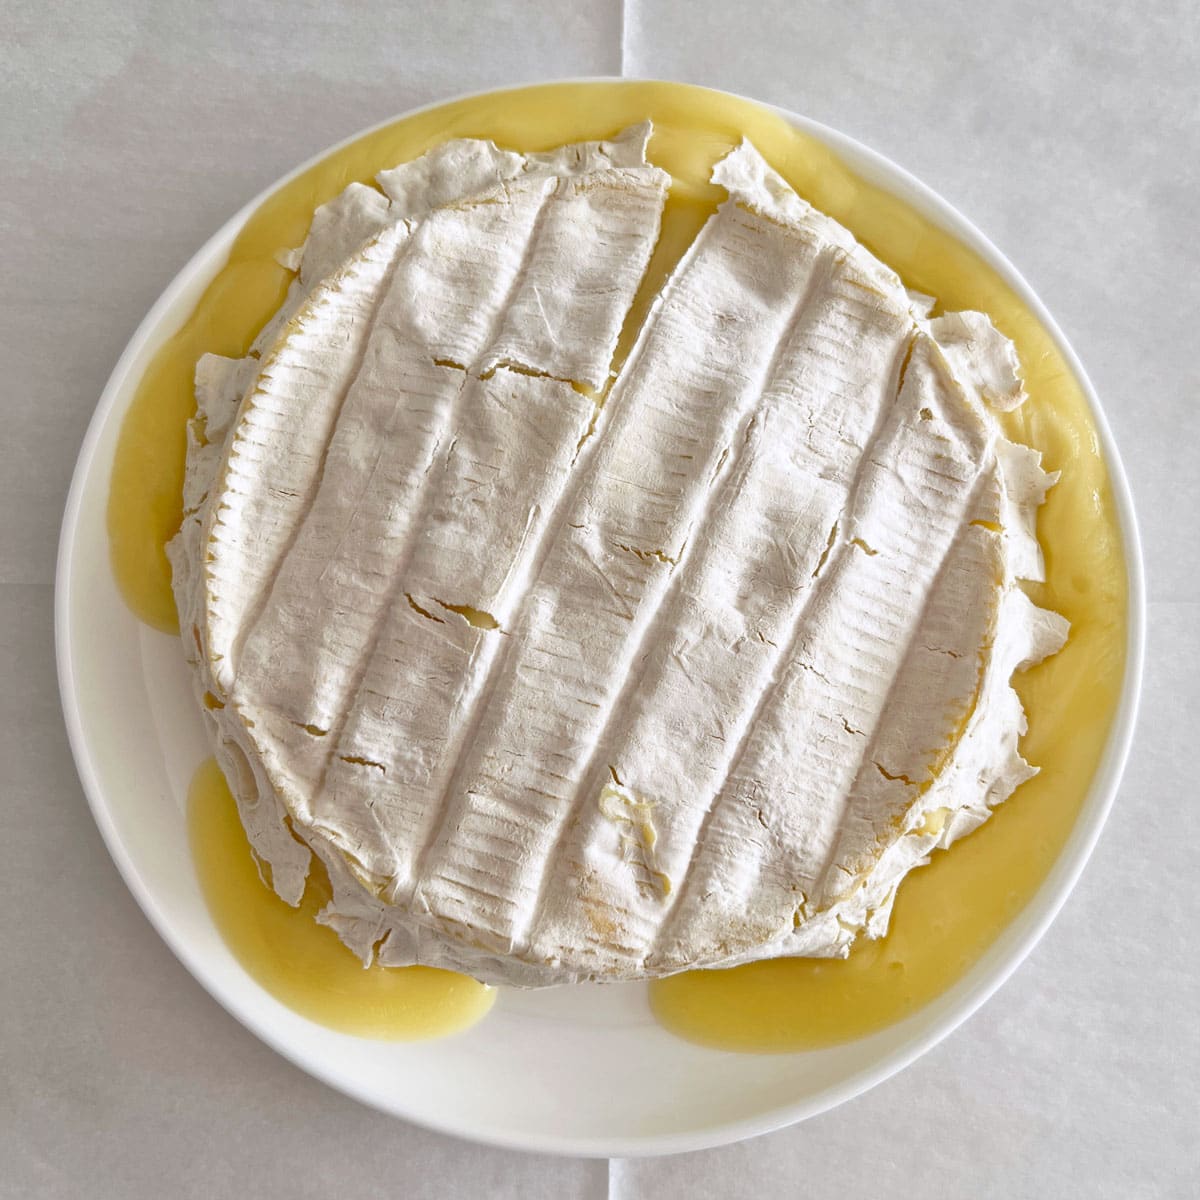
For example, when I used a thin-rind French brie from Whole Foods, by the time the top was soft, the sides disintegrated, and the cheese oozed out, as shown in the photo below. However, if this happens, do not despair! Serve it proudly. I can assure you from personal experience that it will still be delicious.
Recipe FAQs
It's helpful to bring it to room temperature if the rind is very thick, but if it's thin, the cheese will melt too fast. I typically use refrigerator-cold cheese.
Yes! The microwave is a fast and easy way to "bake" the cheese. To use this method, remove the wrapping and place the cheese on a microwave-safe plate. Microwave on high for 30 seconds per side and touch the top of the cheese to see if it's soft. If it's not, flip again and microwave for 30 more seconds. I have found that 30 seconds per side is perfect for an 8-ounce wheel of cheese.
Scoring the rind is helpful if it's very thick. But since rind thickness varies, and scoring it (or scoring too deeply) can lead to the cheese disintegrating, I prefer not to do it.
A baking dish is better for two reasons: It helps contain the oozing cheese better than parchment, and it keeps the cheese soft for longer.
Honestly, I never EVER have leftovers when making baked brie. It's just too delicious to stop eating, no matter how much you make! However, like most leftovers, you should be able to keep these in an airtight container in the fridge for up to 4 days. Reheat them in the microwave - start with 10 seconds and add more as needed to achieve a gooey consistency. I don't recommend freezing the leftovers.
Serving Suggestions
When I make it for my husband and me, I typically serve baked brie with celery sticks, red pepper strips, and pork rinds. When I make it for guests, I add small bowls of honey and pistachios in addition to crostini and grapes.
Other options include baby carrots, pecan halves, a small bowl of jam or preserves (your guests can scoop out a small amount of preserves on top of their cheese), and dried fruit like cranberries.
Recipe Card
Baked Brie Recipe (Oven or Microwave)
Video
Ingredients
- 8 ounces brie
Optional, for Serving:
- 2 tablespoons honey
- ¼ cup pistachios
- 1 cup celery sticks
- 1 cup red pepper strips
- 2 cups plain pork rinds
Instructions
- Preheat the oven to 350°F (see the Notes section below for microwave instructions). Unwrap the cheese and place it in a shallow ovenproof dish or on a piece of parchment paper placed on a rimmed baking sheet.

- Bake the cheese until the center top is very soft when you gently press on it. Depending on the brand of cheese and your oven, this can take anywhere from 10 to 20 minutes, so please start checking after 10 minutes and add 2-3 minutes at a time until the top is soft (See notes below).

- While the cheese is baking, arrange the remaining ingredients (crackers, veggies, fruit, etc.) on a wooden board.

- Carefully remove the baking dish from the oven and place it on the board. Or, if you used parchment, carefully lift the cheese with the parchment and transfer it to the board. Using a cheese knife, cut into the cheese. It will immediately ooze onto the plate (or parchment).

- Dig in immediately! The cheese will remain gooey for about 10 minutes and soft for 10 more minutes.


Notes
- Microwave method: The microwave is a fast and easy way to "bake" the cheese. To use this method, remove the wrapping and place the cheese on a microwave-safe plate. Microwave on high for 30 seconds per side and touch the top of the cheese to see if it's soft. If it's not, flip again and microwave for 30 more seconds. I have found that 30 seconds per side is perfect for an 8-ounce wheel of cheese.
- The baking dish will be very hot - please be careful and warn your guests.
- The nutrition info is for the cheese only.
- Brie cheeses vary in weight, height, fat content, and rind thickness. Ovens vary, too. I always start checking after 10 minutes and add 2-3 minutes at a time until the center top is soft to the touch - that's when the cheese is gooey throughout.
- This recipe was written for an 8-ounce wheel, but it works for 12 ounces, too, and even for a 12-ounce cheese, I would encourage you to start checking after about 10 minutes and add more time as needed.
- It's helpful to bring the cheese to room temperature if the rind is very thick, but if it's thin, the cheese will melt too fast. I typically use refrigerator-cold cheese.
- Scoring the rind is helpful if it's very thick. But since rind thickness varies, and scoring it (or scoring too deep) can lead to the cheese disintegrating, I prefer not to do it.
- A baking dish is better than parchment for two reasons: It helps contain the oozing cheese better than parchment, and it keeps the cheese soft for longer.
- Even when using a baking dish, I like to place it on a rimmed baking sheet, just in case the cheese oozes out of the rind during baking.
- Keep the leftovers in an airtight container in the fridge for up to 4 days. Reheat them in the microwave - start with 10 seconds and add more as needed to achieve a gooey consistency. I don't recommend freezing the leftovers.
Nutrition per Serving
Save this Recipe!
We will also add you to our weekly newsletter. Unsubscribe anytime. See healthyrecipesblogs.com/privacy/ to learn how we use your email.
Disclaimers
Most recipes are low-carb and gluten-free, but some are not. Recommended and linked products are not guaranteed to be gluten-free. Nutrition info is approximate. Please verify it independently. The carb count excludes non-nutritive sweeteners. Please read these Terms of Use before using any of my recipes.


Cindy says
This was sooo good. Used the microwave and served with fresh baguette. Wow!!!
Vered DeLeeuw says
I'm so glad you enjoyed this recipe, Cindy! Thank you very much for the review.